The tub in our upstairs bathroom was yellow porcelain. We used a product called Rustoleum Tub and Tile Re-finisher to make it white. It looked great for a while, then it started to chip off. Luckily it only cost $25. We decided we needed to change out the tub.
Unfortunately the old tub was 17 inches tall, while a standard tub height is 14 inches. That meant we needed to tear down all the tile and redo the shower walls as well. It was a job that needed to be done. The old tile was placed right on the sheet rock. It actually needs to be on a product called cement board, which is mostly water proof.
Nothing to do but go at it with a hammer and my nail puller. It came down pretty easily. The sheet rock was a little rotten at the bottom. The studs were fine.
This wall came down in large chunks. That is always nice. Then we had to break up the large pieces so they would fit in the garbage can. We got so much debris in the garbage can, I could barely move it out to the street.
The shower head was a little low, about 5' 9". We moved that up to about 6' 3". It comes out of the wall above the level of the new tile. That is good, because I did not have to cut the tile to fit around the pipe.
The back wall of the shower had the sheet rock glued right to the cinder block wall. At this point all the demo of the walls was done.
Carter is very helpful. He is always willing to help Dad work. He was a little confused about why we were tearing down the walls. He kept saying almost in a crying voice, "Why are you tearing down my walls Dad?" When we were removing the old tub, he was almost crying again asking, "Why are you taking my tub Dad?" He understood later.
We used some wood scraps and my nail puller to lift up the old tub. We moved from one side to the other lifting the tub as we went and shoving wood underneath to hold it up. It was pretty heavy.
Once we got it up high enough, we got the car jack under it.
We put a jack stand under one end so it did not come crashing down on our toes.
The front corner was making contact with the wall and jamming itself in. We needed to lift the back corner. We found no where to put the head of the jack. The tub was stucker than stuck.
We decided to remove one of the corners of the tub to make it shorter. I got out my angle grinder and cut the steel tub. It made a huge mess with all the metal dust. Some messes cannot be avoided.
I was not able to cut right next to the wall. It got the square cut about 99% and then I hit it with hammer. It broke on the last uncut corner.
It felt good to have that piece of tub cut and out of the way.
It felt awesome to finally have the tub loose and ready to move out. It was very heavy. Jennifer and I were barely able to lift it and move it onto a blanket. Once we got it on a blanket we were able to slide it out the kitchen and out the front door. We left it the on the front walkway. I felt like it was a trophy that I wanted others to see.
The new tub was much lighter and much easier to maneuver. It got stuck only once for a moment or two: just like the Grinch in a chimney.
It felt great to get that new tub in and the drain hooked back up. We felt like the hard work was all done; at least all of the heavy lifting.
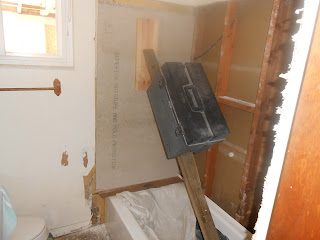
In order to keep the sheet rock and the new cement board all flush we glued it right to the cinder block. This is my tool box adding a bit of pressure while the glue dried.
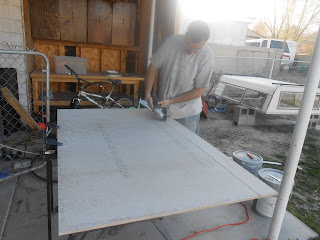
I was able to cut the cement board with my angle grinder and a masonry blade.
The cement board is secured with special, galvanized screws. You need an impact drill to sink in these screws.
Carter handed me screws and kept me working. Here he is holding a screw in his mouth just like Dad.
Got the first wall done. The only difficult cuts were around the valve and faucet. All the other cuts were straight cuts. For the straight cuts I borrowed a tile saw from a friend. The saw made my life easy.
All the tile on and looking as straight as you would expect for a first time tile installer.
Then it was time for the grout. We were very pleased that the grout matched the tile so well. It looked great.
Here I am loading up the float with grout. The packaging on this tile float said that it was disposable: I don't think so. I always clean my tools and reuse them, even when they are label disposable.
Using the float to get the grout in all the gaps. Seth took this picture. I thought he did a good job of centering the picture on the action.
Using a sponge to clean up all the excess grout. Seth also took this picture. He did not cut off my head and showed just what I wanted to show.
Then Seth took this picture. May be he does not always take the best pictures. We will have to keep working on it.
Jennifer finished the job with a bit of caulk. I always use too much caulk and waste more than I leave in the cracks.
This project was a fun learning experience. We are glad to have it done. The next tile job should be easier. We already have the experience and tools.


